How to organize WordPress media library into folders with FileBird
For every standard WordPress based website that has been published on the internet today, one must find at least a single element of media document in their database. Therefore, a media document is quite possibly one of the most fundamental components of each site on the web today. In light of the fact that most of the websites that are viewable on the internet either needed to integrate media files as a part of what adds beauty to the appearance of that website or some website’s main focus is to sell media files as a product or render as services.
Thus, it is very important for a website to keep a well-organized media library. This is to enhance easy accessibility while updating pages, posts or products. A well-arranged media library will make it super easy to handle operations related to media files on the website. Because WordPress has only got a very immature media library section, it will not do much in terms of helping to keep a clean and well-organized media library.
We therefore, need to use another tool for this purpose “FileBird – WordPress Media Library Folders Plugin“.
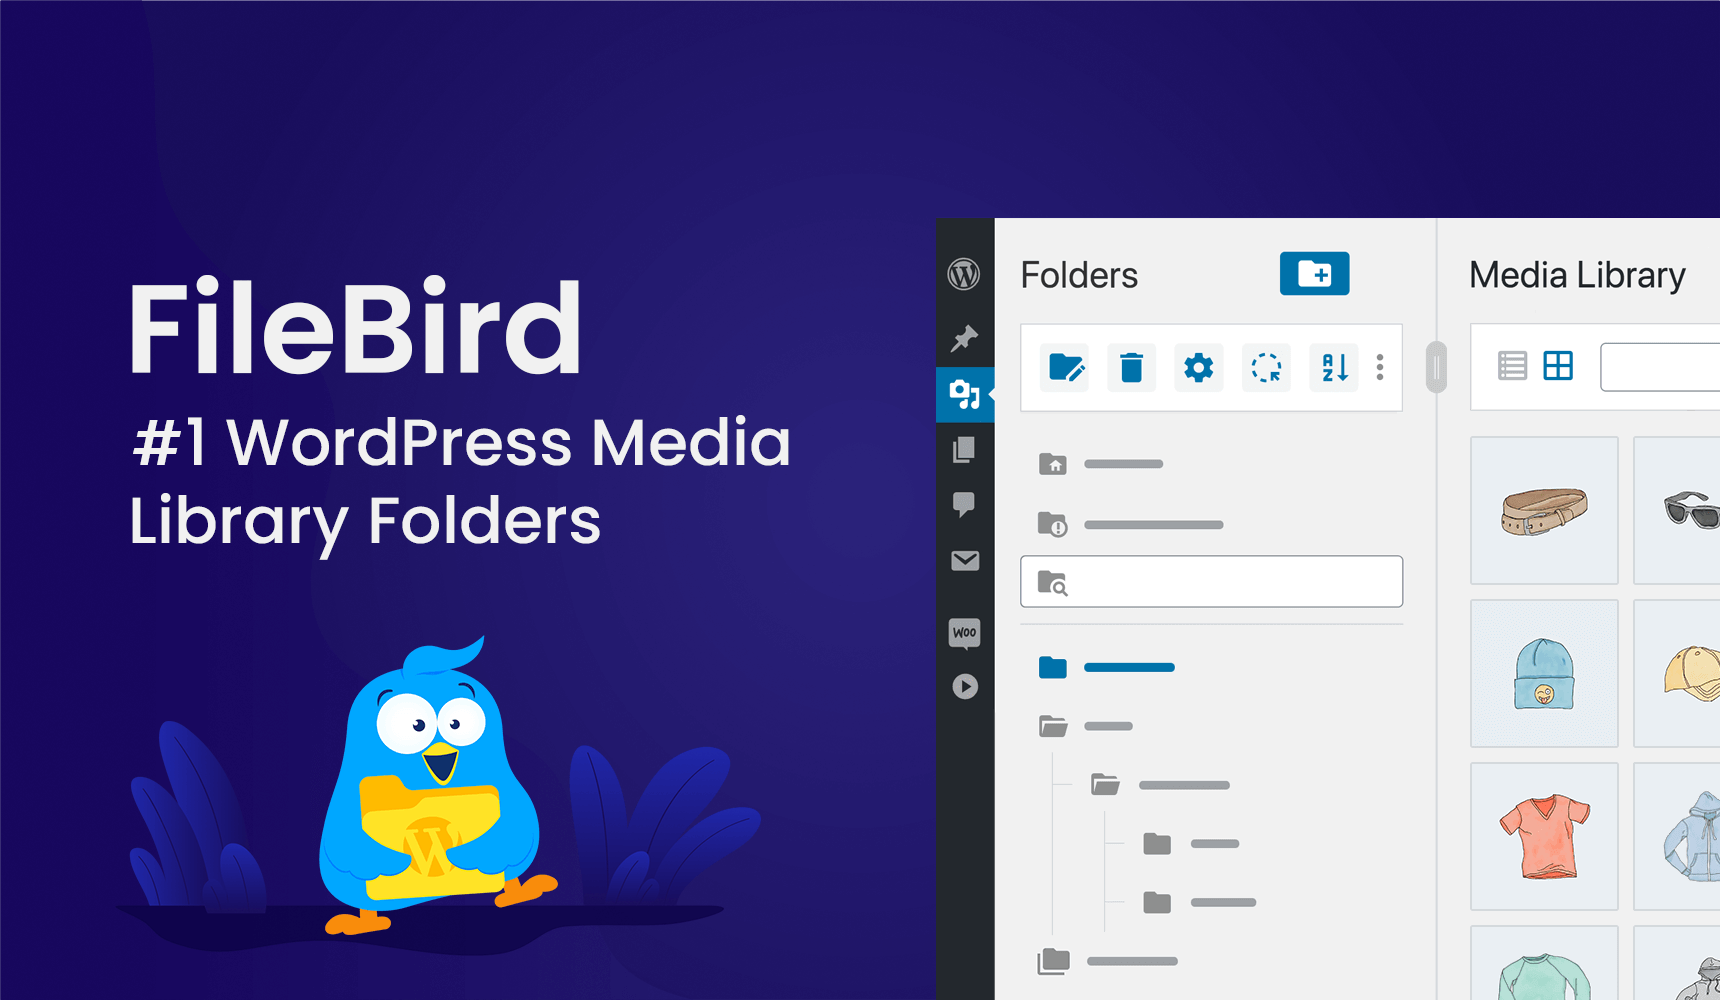
FileBird – WordPress Media Library Folders Plugin
FileBird is a very helpful WordPress media library plugin that would make it super easy to manage the media library. It’s easy to use with its easy drag-and-drop functionality, right click controls and a very nice and intuitive UI. The plugin allows you to organize all your website’s media files in a virtual folder/category. It could also have nested subfolders to help you organize files into categories and subcategories respectively. The created folders and subfolders will also then be accessible when uploading files or updating pages, posts and products.
It is important to note that there are two versions of this plugin. They are the FileBird Lite version (a totally free option) and the FileBird PRO version (a paid option). The Lite version is in fact enough to serve most basic websites. However, you could choose to upgrade to PRO with a cheap one-time fee. It allows you to use the extra PRO functions which support many other third party plugins. You can compare both FileBird versions here to determine which one is suitable for your website’s needs. You can install the Lite version via WordPress plugin repository and the PRO version can be purchased from CodeCanyon.
When you are done making a best pick between both versions; then you can go ahead to install and activate it. It’s what you normally would do with any other plugin.
How To Create Folders In The Media Library
After a successful installation and activation of the plugin, under the ‘Media’ tab, click on ‘Library’ to access and see the plugin options. The library will now show different elements/options for adding new folders, delete folders, rename folders, file, and folder sorting options, etc.
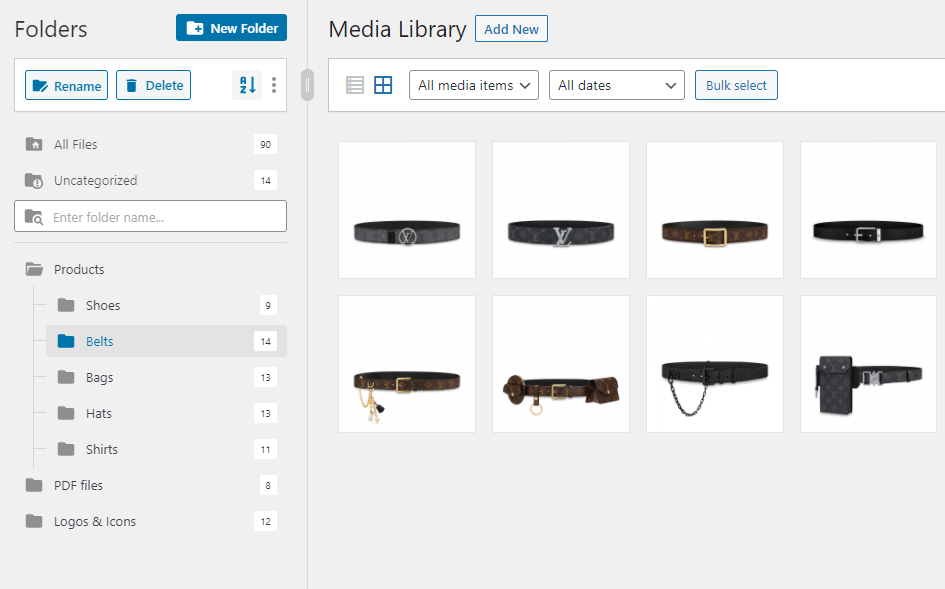
Create folders by using either of two ways. First is by using the right click option, the second is clicking ‘New Folder’ at the upper area of this interface. Then you can write a name for your folders. FileBird also allows the use of spacing and special characters in your naming. You can also create subfolders by clicking on a folder and then click ‘New Folder’ and name it. This would become the subfolder of that clicked folder. Besides, you could drag and drop a main folder inside another folder to make it become a subfolder. It is important to understand that FileBird does not create real folders, but virtual folders. It will not affect the file URLs, no matter what folders the files have been moved to.
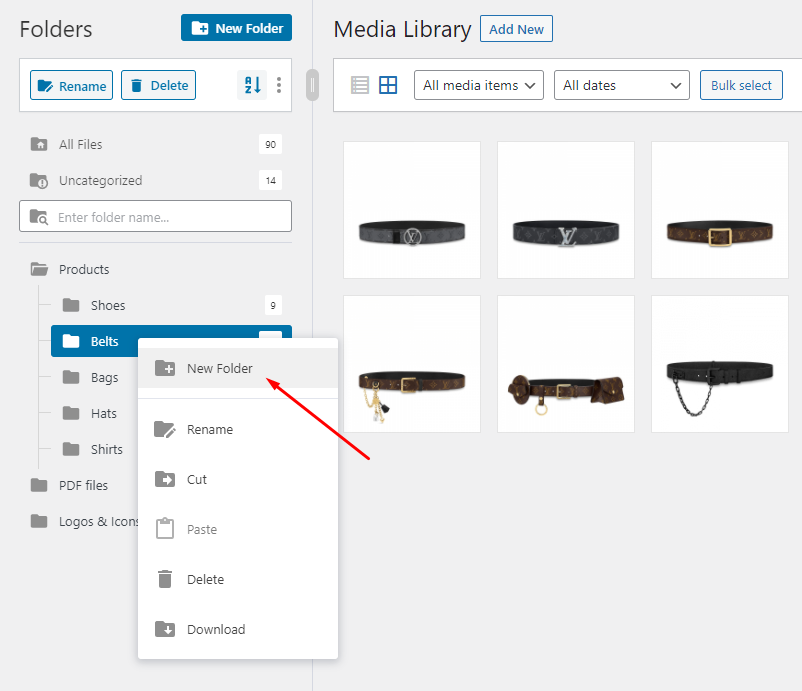
In order to perform some other available functions on a folder you have created, just click on that folder and right click to show the options available. They are: New Folder, Rename (a folder), Cut, Paste, Delete and Download. Also, you can click on the 3 vertical icons at the upper left segment of the library to see and select the option for “Bulk Select” multiple folders to delete them.
How To Organize Media Files In The Library
You can add new media files to a specific folder by clicking on ‘Add new’. This will show a dropdown which allows you to select a folder you would like your file to go into. Then you could drag and drop the file to the space provided to upload it or click on ‘Select Files’ to choose the file from your computer.
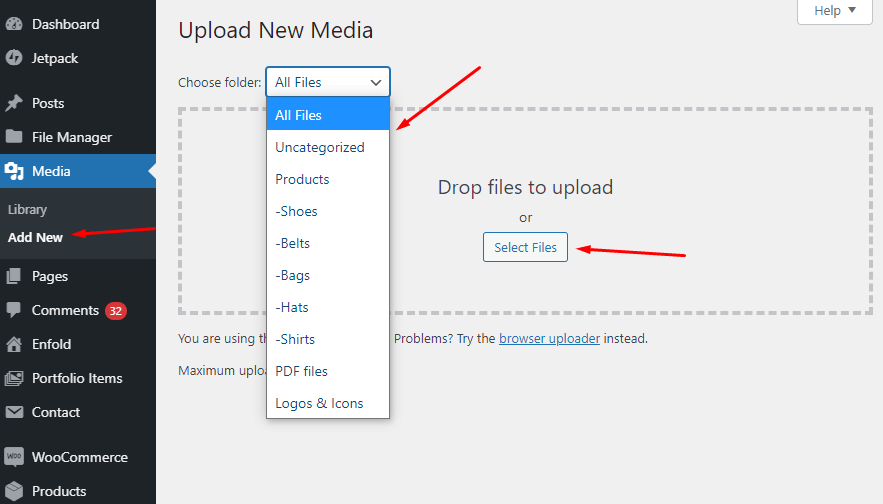
There are two default folders. The ‘All Files’ folder shows all the files in your library, whether categorized or uncategorized. The ‘Uncategorized’ folder shows only the files that have not been added into any folder on your site.
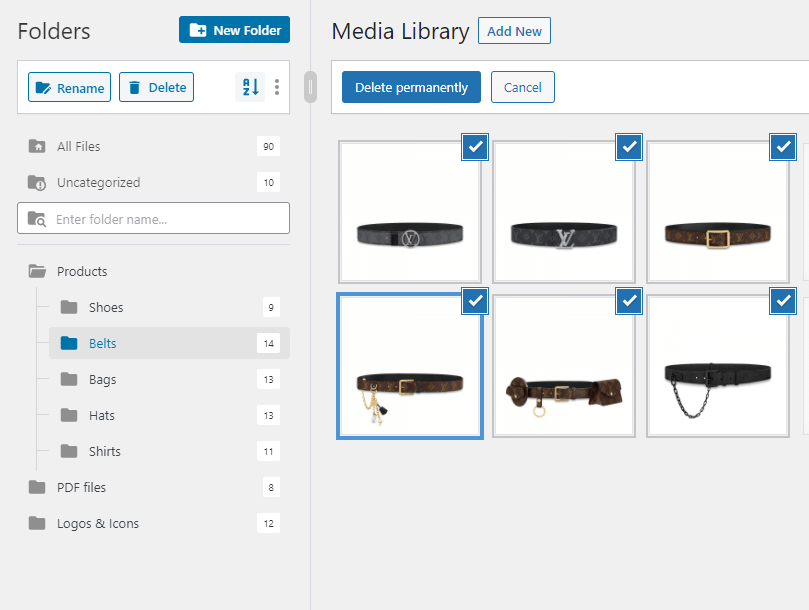
FileBird also has an option to ‘Bulk Select’ files and then drag-and-drop them to arrange in folders or subfolders as you want or to delete multiple files at once (this is a permanent deletion, so please use with caution).
How To Sort Files And Folders
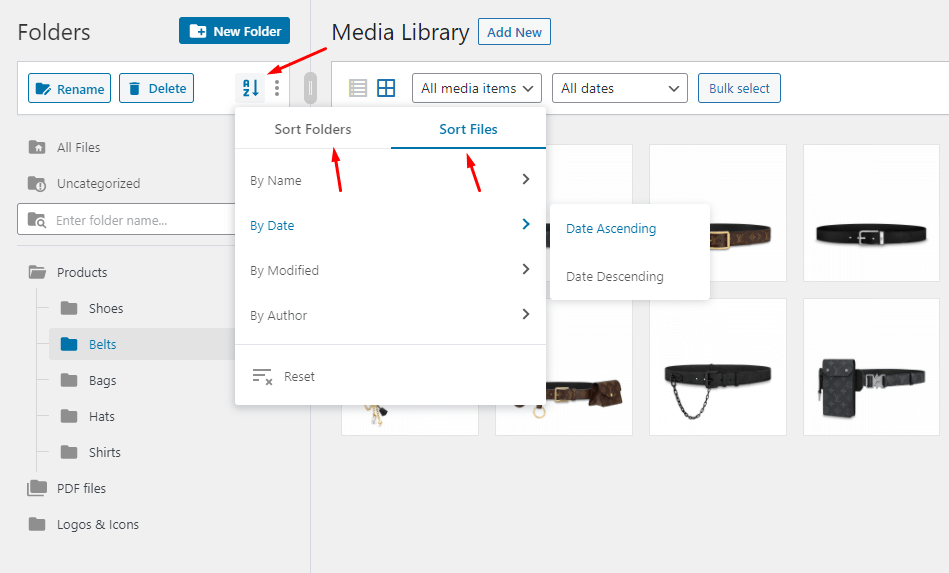
Please note that this is a PRO version’s feature! You can sort folders and files in the media library by clicking on the icon that has alphabets A and Z plus an arrow sign, located beside the three vertical dots. As soon as you click this icon, you would be presented with two tabs. Each represents an option to either ‘Sort Folders’ or ‘Sort Files’ and an option to ‘reset’ the sort settings. The folder sorting could be either in ascending order or descending order of alphabets. The file sorting option allows you to sort either in ascending or descending order of Name, Date, Modification and Author.
You can also sort folders manually by method of drag-and-drop or by cutting and pasting method.
How To Create A FileBird Image Gallery In Gutenberg Editor
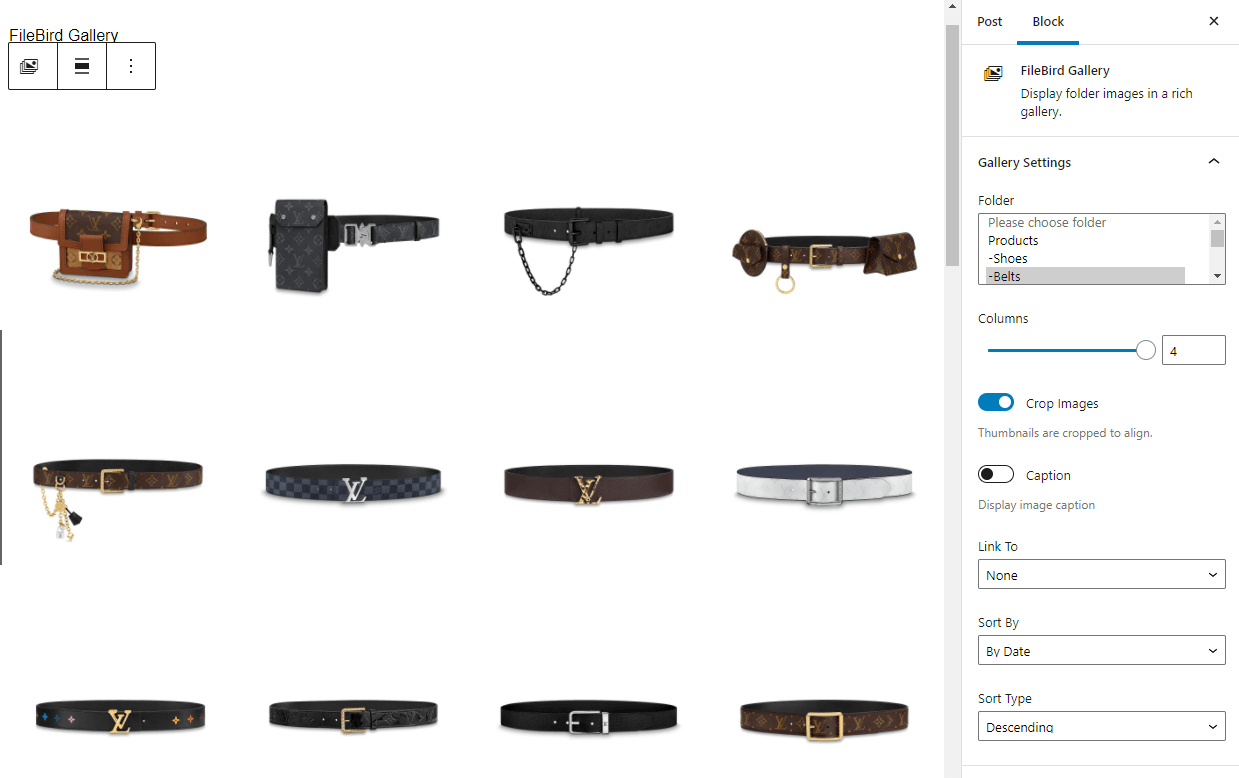
The Image Gallery feature is another cool function that FileBird has to offer. This gallery option works with image files on Gutenberg block editor. Also FileBird was made to be compatible with other popular page builders and gallery plugins.
This Gutenberg Gallery will allow you to select a specific folder/categories to display multiple images from in blocks of defined columns, captions and cropping options. This works in both pages and posts editors. You can sort the images in the Gallery. There is a very cool thing is the fact that, if you decide to add new image files to the folder later on, it would be automatically synchronized with the Gallery block you have already created and published.
How To Insert Media Files Into Pages/Posts
FileBird makes it easy to add media files to your pages, posts and products. Once you click the appropriate page builder element responsible for adding media files, FileBird will then show you the categories/folders you have created. This way you can easily navigate through to select your files and add to pages or posts.
There are two ways by which you can get this done. The first option is to upload media files directly into the page by selecting the file from your computer. The second option is to choose the media files from the existing files in your media library.
For the first option, FileBird gives you the ability to select an already created folder/category first and then upload the file from your computer that automatically goes into the selected category. After uploading from your computer, just click on the ‘Select’ button, it would insert the media file into your page. Also it adds those files into the selected folder which would be visible in the media library area.
The second option gives you the ability to select files to upload from the list of dropdown folder categories that you’ve already created in your library. Thus clicking on the ‘Select’ button will insert the media files into your post or pages.
Conclusion
I hope this article has helped you in one way or the other to understand better, how you can organize the WordPress media library folders and has also given you some insights about FileBird! If you like this article, don’t forget to comment.